
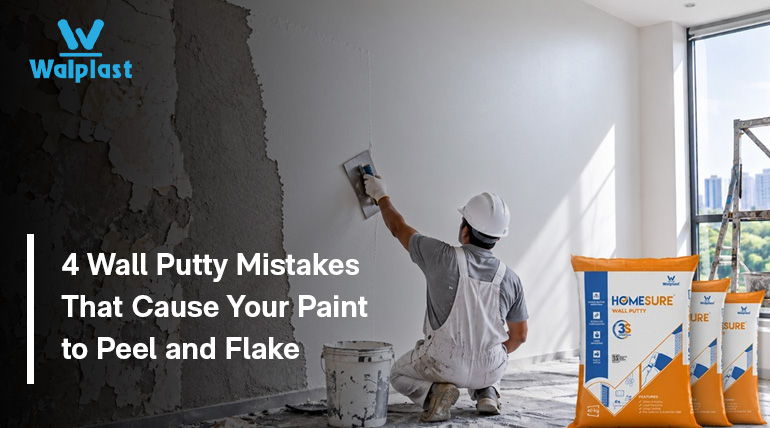
A freshly painted wall can start looking patchy, blistered or flaky much sooner than expected. While paint quality is often the first thing questioned, paint failure can also be linked to what happens underneath the paint layer.
Proper surface preparation plays an important role in creating a durable paint finish. Wall Putty helps create a smoother, more uniform surface between the plastered substrate and the subsequent paint system. However, its performance depends on correct substrate preparation, application, drying and product selection.
From inadequate surface preparation to applying putty before the previous coat has adequately dried, several Wall Putty Application mistakes can affect the final finish. Understanding these common issues can help reduce the risk of peeling, cracking and other paint-related problems.
Why Does Skipping Surface Preparation Cause Wall Putty and Paint to Flake?
Skipping surface prep leaves behind dust, oil, loose particles or uncured plaster, which weakens the mechanical grip wall putty needs to bond and can trap air pockets beneath the surface. Over time, these weak points can cause delamination and take the paint layer down with it.
Wall putty depends on mechanical keying, where the material grips the microscopic texture of the surface beneath it. Dust, oil, loose particles, efflorescence or un-cured masonry can weaken that grip. Air pockets may also become trapped under the putty layer. Over time, these weak points can lead to delamination, and the paint layer above can come away with it.
Using the wrong putty for the depth of the problem adds to the risk. When plaster has deeper undulations, building up many thick layers of fine putty is a common shortcut. Thick layers of a finishing-grade putty can increase the risk of shrinkage cracks and affect the internal cohesion of the putty layer.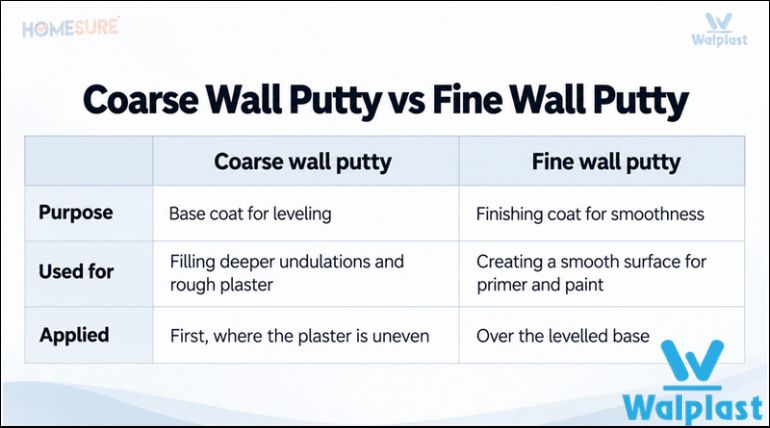
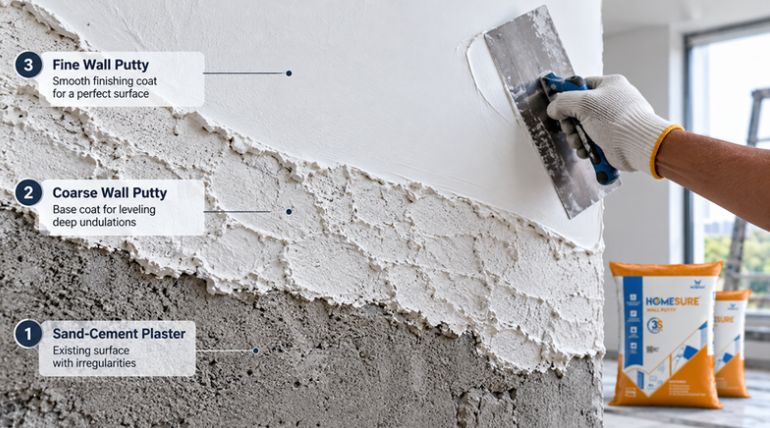
The aim is to build the surface progressively: prepare the substrate, level deeper irregularities with a suitable coarse wall putty, then use fine putty to achieve the required smoothness. This is where Walplast’s system comes together as a sequence rather than a single product: HomeSure Coarse Putty for the initial leveling coat, HomeSure White Cement Wall Putty as the fine finishing coat, and HomeSure Acrylic/Waterlock Primer as the intermediate bonding coat before topcoat paint goes on.
How to avoid it:
● Remove dust, oil, loose particles and efflorescence before applying any putty.
● Allow fresh plaster to cure adequately, and repair cracks and major defects beforehand.
● Prepare or dampen the surface only as recommended in the product’s Technical Data Sheet (TDS).
● Use coarse wall putty for deeper irregularities, then finish with fine putty in thinner layers.
Why Does Rushing Wall Putty Drying Time Cause Blistering and Cracks?
Applying a second coat or primer before wall putty has fully dried traps residual moisture beneath the surface. In warm conditions this moisture can build vapor pressure, contributing to hairline cracks and blistering once the topcoat goes on.
Cementitious wall putty develops its strength through hydration: the reaction between cement and water along with gradual evaporation of excess moisture. Both processes take time.
If a second coat or paint primer is applied over a putty that still holds significant moisture, that moisture can be trapped inside the layer. In warm conditions, trapped moisture may turn into vapor and build pressure beneath the surface, which can contribute to hairline cracks and blistering in the topcoat.
The right wall putty drying time depends on temperature, humidity, layer thickness, the substrate and the specific product. Each coat often needs around 4 to 6 hours, and longer in cool or humid conditions. The TDS should always be treated as the final reference for recoat requirements.
Light inter-coat sanding is the other half of this step. It removes loose surface particles and creates a uniform profile that gives the primer something to bite into. Sanding should be done only once the putty has reached the stage the manufacturer specifies.
How to avoid it:
● Let each coat dry fully before applying the next coat or primer.
● Allow extra time in cool, damp or poorly ventilated conditions.
● Sand lightly between coats, and remove all dust before priming.
Is There a Best Waterproof Wall Putty for the Rainy Season?
No single putty replaces dedicated waterproofing, but a polymer-modified, hydrophobic formulation resists localized surface moisture better than traditional plaster. This helps manage humid application conditions. However active leaks or structural seepage still need a primary waterproofing system first.
Working during the monsoon adds site challenges. High relative humidity slows evaporation, so putty and plaster take longer to dry. Damp plaster can also push soluble salts toward the surface, which shows up as efflorescence and can interfere with adhesion between putty and paint.
A polymer-modified, hydrophobic wall putty can lower capillary water absorption compared with traditional plaster. That helps the coating system cope better with localized surface moisture and humid application conditions. For wall putty in the rainy season, this makes formulation an important part of product selection.
Searches for the “best waterproof wall putty” usually reflect a real concern about moisture. It helps to be precise about what a putty can do. High-performance hydrophobic formulations are designed to resist localized surface moisture and high humidity during application. They should not be treated as a substitute for a dedicated waterproofing system.
Active structural rain seepage or heavy masonry leaks require a primary waterproofing slurry/membrane applied directly to the wall prior to plastering and puttying. Moisture problems need to be solved at their source instead of relying on the finishing layer alone.
How to avoid it:
● Do not apply putty over walls that are visibly damp or have active leaks.
● Address the source of moisture before plastering and puttying.
● Allow more drying time between coats when humidity is high.
● Choose a polymer-modified, water-resistant formulation suited to humid conditions.
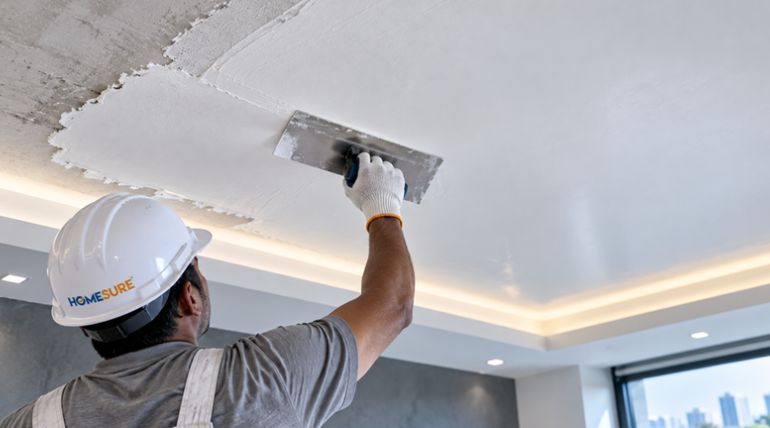
Why Does the Wrong Putty Cause Ceilings to Flake and Sag?
A low-cohesion putty can slump, creating uneven thickness and casting visible shadow lines under angled lighting, while the weaker bond at the substrate can lead to flaking over time.
Ceiling work has to hold its shape against gravity. A putty with low cohesion may slump or sag before it develops enough strength. This can lead to uneven thickness and a weaker shear bond with the substrate, and over time, especially with structural vibrations, it may contribute to flaking.
Ceilings are also visually demanding. Under ambient room lighting or grazing cove lights, even small ridges and slumped areas can cast visible shadows that paint will not hide.
The best putty for ceiling work depends on the substrate, the application conditions and the manufacturer’s recommended use. As a starting point, look for:
● a formulation recommended for ceilings in its TDS
● good cohesion and shape retention during overhead application
● strong adhesion to the substrate
● the ability to sand down to a uniform, shadow-free, light-reflecting finish
How to Apply Wall Putty: A Step-by-Step Guide
Water ratio, coat thickness, drying time and pot life vary between products, so always follow the packaging and the TDS. As a general sequence:
1. Inspect and prepare the substrate. The surface should be sound, cured, clean and reasonably level. Remove dust, oil, loose material and efflorescence, and repair cracks and major irregularities.
2. Mix the putty correctly. Use clean water and the specified water-to-powder ratio. Mix to a smooth, lump-free consistency, and do not add extra water to improve workability.
3. Apply One Primer coat. Once the substrate is clean and dry, apply a suitable primer evenly across the surface. Let it dry fully as directed in the product TDS before applying the first coat of putty.
4. Apply the first coat. Where the plaster has deeper undulations, use HomeSure Coarse Putty as the leveling layer, following the surface preparation guidance in the TDS.
5. Allow the coat to dry fully. Give it the drying time the manufacturer specifies, allowing for temperature and humidity.
6. Apply the finishing coat. Use HomeSure White Cement Wall Putty in thin, uniform layers to achieve the required smoothness.
7. Dry, sand lightly and dust off. Sand only when the putty is ready for it, then remove all dust before priming.
8. Apply the bonding primer.HomeSure Acrylic/Waterlock Primer goes over the sanded putty as the intermediate coat, sealing the surface and giving the topcoat paint a stable, uniform base to bond to.
Technical Best Practices: Choosing the Best Wall Putty for a Long-Lasting Finish
Whether the project involves walls or ceilings, four fundamentals support a durable paint finish:
● Prepare the substrate properly. Remove contaminants and address major defects before application.
● Use the appropriate leveling material. Level deeper irregularities with coarse putty instead of thick layers of fine putty.
● Respect drying and recoat intervals. Follow the manufacturer’s drying, sanding and recoat requirements, allowing for site conditions.
● Select the right formulation. Choose a putty for walls and ceilings based on the substrate, location and expected exposure.
| Mistake | What may go wrong | How to avoid it |
| Skipping base preparation and the wrong putty for leveling | Poor adhesion, delamination, shrinkage cracks | Clean the surface, level with coarse putty, finish with fine |
| Rushing drying time and skipping sanding | Trapped moisture, blistering, hairline cracks | Follow drying intervals, sand lightly between coats |
| Ignoring moisture in the rainy season | Efflorescence, slow drying, weak bond | Fix moisture at the source, use a water-resistant formulation |
| Wrong putty for ceilings | Slumping, shadow lines, flaking | Choose a cohesive, sandable putty recommended for ceilings |
For contractors and project consultants, the best wall putty for a project should be chosen on documented performance and suitability, not marketing claims alone. Walplast’sHomeSure system: Coarse Putty for leveling, White Cement Wall Putty for the finishing coat, and Acrylic/Waterlock Primer as the bonding layer is manufactured in line with IS 17545:2021 (Specification for White Cement Based Wall Putty), the Bureau of Indian Standards’ dedicated standard for the category, and uses low-VOC, non-toxic polymer additives as part of a sustainability-conscious manufacturing process. Before site execution, refer to the relevant TDS for each product’s water-mixing ratio, pot life, application requirements and coverage.
A well-prepared substrate, correct wall putty application, adequate drying time and sound finishing practice together give the paint system a durable foundation.
To learn more, explore the HomeSure Wall Putty range by Walplast and consult the product’s TDS.