

Stained, cracked or crumbling grout can make a tiled surface look worn even when the tiles remain in good condition. Regrouting can refresh the finish without replacing the tiles—but only when the installation underneath is sound.
A lasting result starts with understanding why the old grout failed. Surface staining may need cleaning rather than replacement, while recurring cracks or damp patches can indicate movement or moisture problems that new grout alone will not resolve.
This guide explains when to re-grout, how to prepare existing joints, and what to consider when choosing and applying replacement grout.
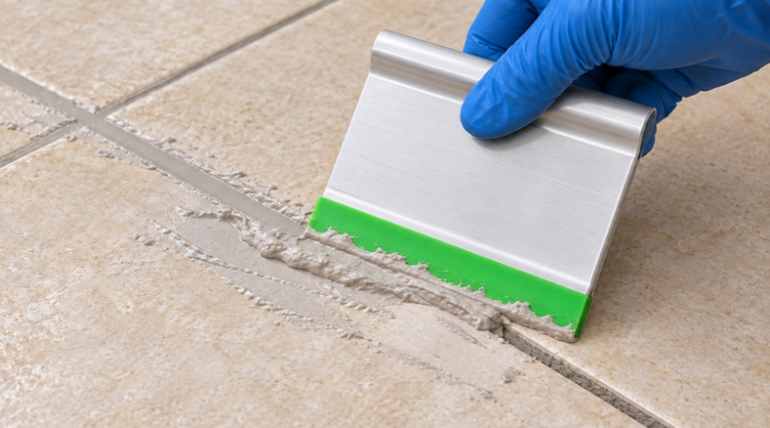
What Is Tile Grout?
Tile grout fills the joints between tiles, helps prevent dirt from collecting in the gaps and creates a consistent finished appearance.
The two common categories are cementitious and epoxy grout. Cementitious grout uses cement, fillers and, in many formulations, polymers. Epoxy grout uses resin and hardener chemistry with fillers to produce a dense joint suited to demanding service conditions.
Neither type replaces tile adhesive, movement joints or the waterproofing system required beneath tiles in wet areas.
When Do Old Tile Joints Need Regrouting?
Not every discoloured joint needs replacement. Start by cleaning a small area with a cleaner suitable for the tile and grout. If the joint remains firm and intact, cleaning may be sufficient.
Warning sign | Recommended action |
Surface discolouration with firm, intact grout | Clean first and reassess |
Crumbling grout or loose fragments | Remove defective material and assess for regrouting |
Cracks that repeatedly return | Investigate movement or substrate problems first |
Gaps along tile edges | Check for grout bond failure and tile movement |
Persistent dark staining | Clean and investigate moisture before deciding on replacement |
Loose tiles or recurring damp patches | Assess the installation before regrouting |
Gently check suspect grout with a suitable hand tool. Material that readily crumbles or detaches needs further assessment. Avoid aggressive probing that could chip tile edges or damage layers beneath the joint.
If tiles move under pressure, cracks extend across several tiles, or dampness keeps returning, seek professional advice before proceeding.
How to Remove Old Grout Without Damaging Tiles
Careful removal creates enough space for the replacement grout to bond and fill the joint properly. A thin layer applied over deteriorated grout is unlikely to provide a dependable repair.
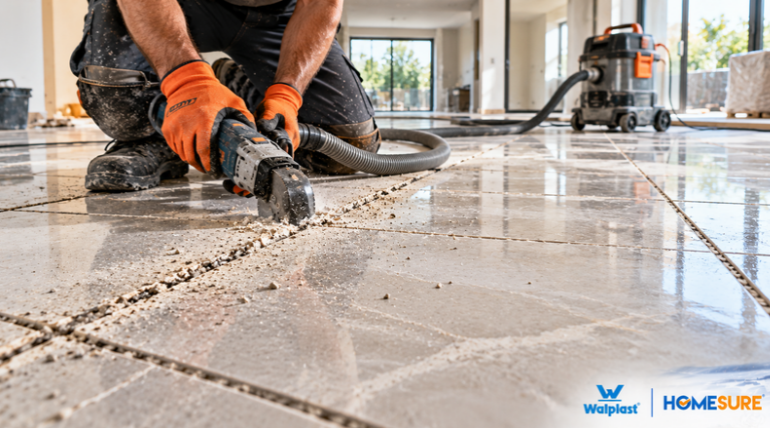
A manual grout rake offers control around narrow joints and delicate tile edges. An oscillating tool with a suitable grout-removal blade can help on larger areas, provided the blade fits the joint and is used carefully.
Work in short, controlled passes along the joint centreline. Wear eye protection and use suitable dust extraction and respiratory protection for the material being removed.
How Deep Should You Remove Old Grout?
Follow the replacement grout manufacturer’s requirements for joint depth and preparation. The appropriate depth depends on the tile thickness, joint condition and selected product.
Remove loose, weak or contaminated grout and leave sound, clean joint surfaces. Take care not to cut into the tile adhesive, waterproofing membrane or concealed services.
Vacuum out debris and inspect the exposed tile edges. Significant chips or loose tiles may require repair or replacement before grouting. Do not widen joints simply to conceal damage.
Choosing Grout for Existing Tiles
Choose grout according to the joint dimensions, tile finish, location and expected exposure. Colour matters, but compatibility and service conditions should guide the decision first.
Check Joint Width
Measure the existing joints and compare them with the selected product’s stated range.
Do not assume that every cementitious or epoxy grouts suits the same joint dimensions.
Check Tile Compatibility
Porous stone, unglazed tiles, textured surfaces and some polished finishes can be vulnerable to staining, scratching or difficult residue removal.
Test the selected grout and cleaning method on a spare tile or an inconspicuous area. Use a compatible sealer, grout release or masking method only where recommended.
Do not automatically pre-wet porous tiles. Follow the selected product’s preparation instructions; HomeSure TileEx Cementitious Tile Grout requires dry joints.
When to Consider Epoxy Grout
Epoxy grout advantages are considered where joints face frequent wetting, staining or demanding cleaning conditions, provided the product is approved for the application.
While choosing the best Epoxy Grout for suitable residential and commercial installations, including kitchens and bathrooms, HomeSure TileEx Epoxy Grout may be considered. Swimming pools and chemically exposed areas require confirmation of the product’s suitability, curing requirements and resistance to the intended exposure.
Epoxy grout lifespan is based on routine cleaning. Dirt and organic deposits can accumulate on the surface, and it is also resistance to chemicals.
Application also requires planning. Accurate mixing, manageable batches and timely cleaning are essential to avoid hardened residue.
When Cementitious Grout Is Appropriate
Polymer-modified cementitious tile grout remains a practical option for many conventional wall and floor installations within its specified limits.
HomeSure TileEx Cementitious Tile Grout can be considered where its joint-width rating and performance suit the project. For exterior installations, also check exposure conditions, drainage and movement-joint requirements.
The choice should reflect the installation’s needs rather than a general assumption that one grout type is always better.
How to Regrout Old Tiles
Step 1: Resolve the Cause of Failure
Check for leaks, loose tiles, substrate movement and defective flexible joints. Complete any necessary repairs before applying new grout.
At corners, perimeters and designated movement joints use the specified flexible sealant or joint system. Do not fill these locations with rigid grout where movement accommodation is required.
Step 2: Clean and Prepare the Joints
Remove defective grout to the required depth, then vacuum the joints thoroughly. Remove dust, grease, cleaning residue and other contaminants that could interfere with adhesion.
If cleaning introduces moisture, allow the joints to reach the condition required by the grout manufacturer before application. Follow HomeSure’s dry-joint requirement for its cementitious grout.
Avoid: Grouting over loose material, unresolved dampness or contaminated joint surfaces.
Step 3: Mix According to the Product Instructions
Use clean containers and accurately measured quantities.
For cementitious grout, add only the specified amount of clean water. Excess water can affect strength, colour consistency and shrinkage. Do not add water to restore workability once the mix begins to stiffen.
For epoxy grout, combine the supplied components in the specified proportions and sequence. Do not add water or solvent unless expressly instructed.
Mix only what can be applied within the product’s working time. Divide packs only if the manufacturer permits it and the proportions can be measured accurately.
Avoid: Estimating mixing ratios or extending working time with extra liquid.
Step 4: Pack the Joints Fully
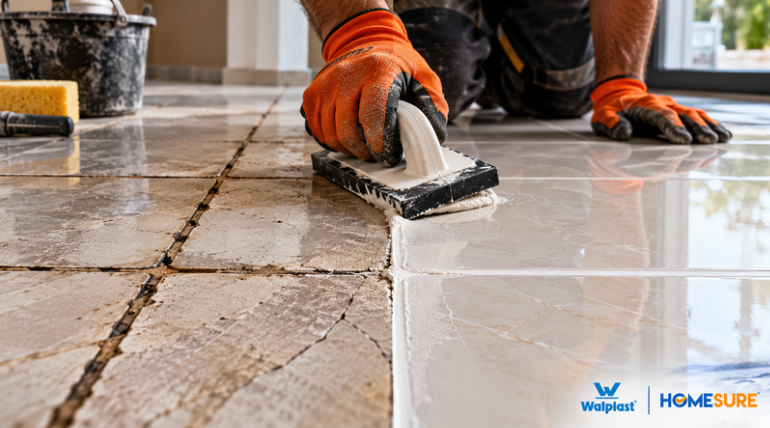
Use a suitable rubber float or recommended applicator to press grout firmly into the joints. Work diagonally across the joint lines and make several passes where needed to achieve complete filling.
Remove surplus material with the float before beginning the prescribed cleaning process. Finish the joint profile to suit the tile edges; bevelled tiles do not necessarily require grout level with the top face.
Avoid: Spreading grout across the surface without adequately packing the joint beneath it.
Step 5: Clean Within the Recommended Window
Follow the product’s cleaning sequence and timing. Pot life, initial cleaning and final residue removal are separate stages.
Use the recommended sponge or cleaning pad with controlled amounts of water. Rinse regularly and avoid disturbing fresh joints.
For epoxy grout, inspect the surface carefully for remaining film. If residue hardens, use only a compatible remover approved for both the grout and tile.
Avoid: Flooding the surface, washing out fresh grout or allowing residue to harden because of delayed cleaning.
Step 6: Protect the Installation During Curing
Keep traffic, water and cleaning chemicals off the installation for the periods specified by the manufacturer.
Permission for light foot traffic does not automatically mean the surface is ready for shower use, pool filling, heavy traffic or chemical cleaning. Confirm each requirement before returning the area to service.
Hot conditions can shorten working time. Store materials within the recommended temperature range and use smaller batches where appropriate.
Avoid: Treating initial setting as full cure or cooling components outside the manufacturer’s approved conditions.
A Refreshed Finish Starts With Preparation
Regrouting can improve the appearance and serviceability of an existing tiled surface when the tiles and underlying installation remain sound.
The essential steps are to identify the cause of deterioration, remove defective grout carefully, prepare clean joints, select a compatible product and follow its mixing, cleaning and curing instructions.
Walplast’s HomeSure TileEx range includes cementitious grout and epoxy grout options for different installation needs. Choose the product that matches the tile, joint dimensions and exposure conditions, and consult the current technical data sheet before beginning.
Explore the HomeSure TileEx today.