
A smooth and attractive paint finish begins long before the first coat of paint is applied. Even premium paint may appear uneven or patchy when the underlying wall contains pores, minor imperfections or an inconsistent surface.
This is where wall putty plays an important role. Applying wall putty before painting helps create a smooth and uniform base, supporting better paint application, finish and durability.
This guide explains the difference between wall putty and primer, the correct surface-preparation sequence and the key steps involved in applying wall putty.
Wall Putty vs Primer: Understanding the Surface-Preparation Sequence
Wall putty and primer are sometimes considered interchangeable, but they perform different functions. Wall putty helps level minor surface irregularities, whereas primer prepares the surface for better wall putty and paint adhesion and more uniform application.
They perform different but complementary roles within a complete painting system.
Parameter | Wall Putty | Primer |
Core function | Fills pinholes and minor surface imperfections to create a smooth base | Improves paint adhesion and regulates surface absorption |
Base material | Commonly white cement-based and polymer-based | May be water-based, cement-based or solvent-based, depending on the surface and paint system |
Applied over | Clean, dry and properly prepared plaster or another compatible substrate | Smooth, prepared and dust-free putty surface |
Primary benefit | Helps level the surface and improve finish uniformity | Supports adhesion, coverage and colour consistency |
Number of coats | Commonly two thin coats, depending on surface condition and product instructions | Generally one coat or as recommended for the selected paint system |
Effect on paint application | Creates a smoother and more uniform base | Helps minimise uneven paint absorption |
Sequence | Applied after and before primer | Applied before and after putty and before paint |
The general sequence for a properly prepared wall is:
Surface inspection and repair →Primer → wall putty → primer → paint

If additional levelling is required, POP or another suitable levelling material may be used before wall putty. However, POP is not necessary when the wall is already level and in suitable condition.
Putty helps smooth the surface, while primer creates a compatible base for the paint. If putty is skipped on an uneven wall, the primer and paint may follow the underlying surface irregularities. If primer is skipped after putty, the surface may absorb paint unevenly, potentially affecting adhesion, coverage and the final appearance.
Walls affected by dampness, seepage, structural cracks or substrate movement require appropriate repair before the putty and painting process begins. Wall putty and standard primer should not be treated as substitutes for waterproofing or structural repair.
How Wall Putty Supports a Smooth Finish for Premium Paints
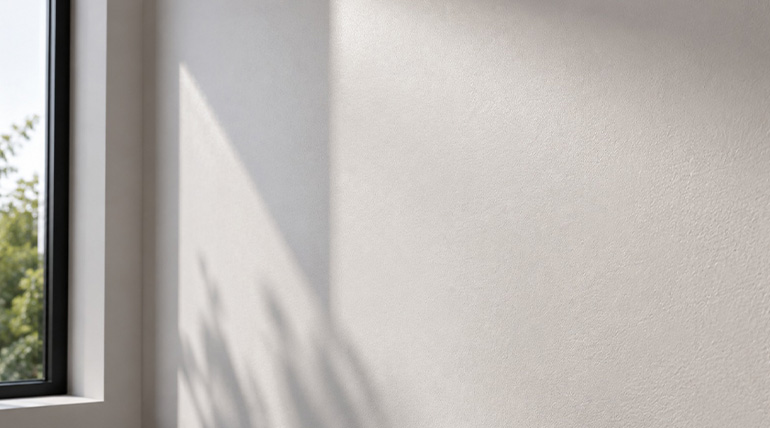
As homeowners become more particular about interior finishes, they are increasingly choosing premium emulsions for living rooms, bedrooms and other important spaces. However, the performance and appearance of the final paint coat depend significantly on the condition of the underlying surface.
Wall putty helps provide a smooth and consistent base so that the paint can be applied more uniformly.
Wall condition | Possible result without putty | How putty helps |
Trowel marks and minor ridges | Surface irregularities may remain visible under the paint | Helps level minor variations so light reflects more evenly |
Porous plaster | Paint may be absorbed unevenly | Creates a more uniform base for subsequent primer application |
Pinholes and minor imperfections | Small defects may remain visible through the paint | Fills and levels minor surface imperfections |
Uneven surface reflectivity | Colour and sheen may appear inconsistent | Supports a more uniform final appearance |
Minor surface undulations | The finished wall may look uneven, particularly under direct light | Helps improve surface smoothness before priming and painting |
Wall putty is intended to address minor surface defects. Structural cracks, active cracks, deep holes, dampness and recurring surface failures should be assessed and repaired using appropriate materials before wall putty is applied.
Choosing the right wall putty and following the recommended application process can support improved paint coverage, a more consistent appearance and better performance of the overall paint system.
How to Apply Wall Putty for a Smooth, Long-Lasting Finish
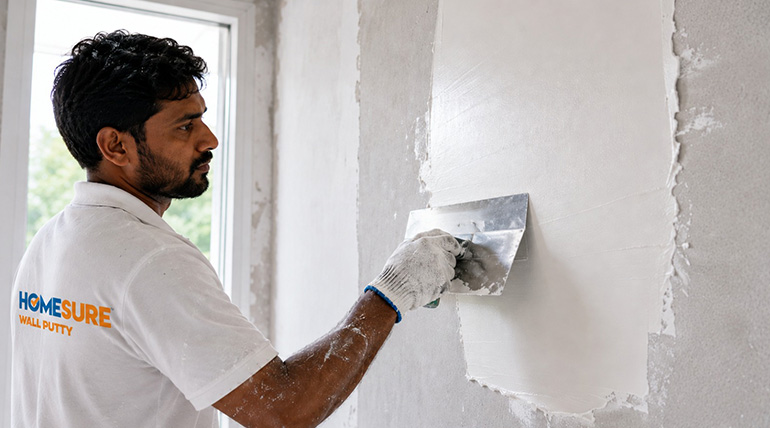
Correct wall putty application depends on careful surface preparation, proper mixing and sufficient drying time between coats.
Application methods, water ratios, coat thicknesses, sanding requirements and drying times can vary by product. Always follow the instructions provided on the product packaging or technical data sheet.
1. Inspect and prepare the wall
Before applying wall putty, inspect the surface for dampness, seepage, loose plaster, efflorescence, structural cracks or other defects.
Any source of moisture or substrate failure must be addressed first. Applying putty over a damp or unstable surface can affect adhesion and reduce the performance of the complete paint system.
2. Clean the surface
Remove dust, dirt, grease, loose particles and flaking material from the wall. The surface should be clean, stable and free from contaminants that may interfere with adhesion.
Previously painted surfaces may require scraping or sanding, depending on their condition and the recommended application system.
3. Prepare the surface as recommended
For cement-based wall putty, the substrate may need to be lightly dampened before application. However, excess or standing water should not remain on the surface.
Surface preparation requirements may differ for acrylic or polymer-based putties. Follow the product-specific application instructions.
4. Mix the putty correctly
For powder-based putty, add the recommended quantity of clean water and mix thoroughly until a smooth, lump-free paste is obtained. A mechanical mixer may help produce a more uniform consistency.
Do not add extra water after the mixture has begun to set. Prepare only as much material as can be used within the product’s specified working time.
Ready-to-use putties should be stirred properly and applied according to the manufacturer’s directions.
5. Apply the primer coat
Once the surface is clean, stable and properly prepared, apply a compatible primer as recommended for the selected wall putty and substrate. This initial primer coat helps regulate surface absorption, improves adhesion and provides a uniform base for putty application.
Allow the primer to dry completely before applying the wall putty. Follow the manufacturer’s instructions regarding primer selection, application method and drying time.
6. Apply the first coat
Use a suitable putty blade or trowel to apply a thin, even coat. Avoid excessive thickness, as thick or uneven application may affect drying and surface performance.
The first coat should fill minor pores, pinholes and surface irregularities while creating a more uniform base.
7. Allow the first coat to dry
Let the first coat dry completely before proceeding. Drying time may vary depending on the product, coat thickness, temperature, humidity and ventilation.
Do not rely on a fixed drying time for every application. Always follow the manufacturer’s recommendations and confirm that the surface has dried adequately.
8. Prepare the surface for the second coat
Once the first coat has dried, remove any loose particles or minor projections as recommended. If sanding is required, use the specified grade of sandpaper and apply gentle, even pressure.
Remove all dust before applying the next coat.
9. Apply the second coat
Apply a second thin and uniform coat to correct the remaining minor imperfections and improve overall smoothness.
The required number of coats depends on the condition of the substrate and the specifications of the selected wall putty. Avoid exceeding the recommended total thickness.
10. Allow the surface to dry and finish it appropriately
After the final coat has dried, prepare the surface according to the product instructions. If sanding is recommended, sand it gently to obtain an even finish.
Remove all sanding dust and loose material before primer application. Residual dust can interfere with primer adhesion and affect the final appearance.
11. Apply a compatible primer and paint
Once the putty surface is properly prepared, apply a compatible primer. The primer helps regulate surface absorption and provides a suitable base for the finishing coats.
Allow the primer to dry completely before applying the recommended number of paint coats.
Common Mistakes to Avoid When Applying Wall Putty
Even a good-quality product may not perform as intended if the surface preparation or application process is incorrect. Avoid these common mistakes:
• Applying putty over damp, dusty or unstable surfaces
• Ignoring the source of seepage or recurring dampness
• Using putty to repair structural or active cracks
• Adding more water than the recommended quantity
• Applying one excessively thick coat instead of thin, uniform coats
• Applying the next coat before the previous coat has dried
• Leaving sanding dust on the surface before priming
• Using incompatible putty, primer and paint products
• Ignoring the application instructions provided by the manufacturer
Following the complete recommended system is essential for achieving consistent results.
Choosing the Right Wall Putty
The appropriate wall putty should be selected based on the substrate, location, surface condition and intended paint system.
Factors to consider include:
• Interior or exterior application
• Type and condition of the substrate
• Required smoothness and finish
• Compatibility with the selected primer and paint
• Exposure to moisture and weather
• Recommended application thickness
• Coverage and drying requirements
HomeSure Wall Putty helps create a smooth and uniform base for subsequent primer and paint application. For optimum results, the product should be selected and applied according to the recommended surface-preparation and application guidelines.
The Bottom Line
Wall putty is an important part of surface preparation before painting. It helps fill pinholes and minor imperfections while creating a smoother and more uniform base for primer and paint.
For effective results, the wall should be clean, stable and free from untreated dampness, loose material and structural defects. The putty should then be mixed and applied according to the manufacturer’s recommended water ratio, coat thickness and drying time. Once the surface has dried and been prepared appropriately, a compatible primer and paint system can be applied.
By choosing the right wall putty and following the recommended application process, homeowners and professionals can support better paint coverage, a more consistent finish and improved long-term performance.
For more information about HomeSure wall-preparation and construction solutions, visit Walplast.