Wall tiling transforms plain vertical surfaces into beautiful, functional spaces — be it backsplashes, bathroom walls, or accent feature walls. But achieving a perfect wall tile installation requires more than just tiles and grout. The right tile adhesive and correct application are the foundation of a durable and visually appealing finish.
In this easy-to-follow guide, you’ll learn how to choose the right tile adhesive for vertical walls, prepare the surface, apply adhesive like a pro, and avoid common tiling mistakes.
What You’ll Need
Before diving into the steps, make sure you have the following tools and materials ready:
- Tile adhesive (suitable for vertical walls)
- Notched trowel
- Mixing bucket and paddle
- Spirit level
- Tile spacers
- Clean sponge & water
- Tiles (ceramic, vitrified, porcelain, stone, etc.)
Why Vertical Tiling Needs Special Adhesive
Unlike floor tiles, wall tiles must withstand gravity pulling them down until the adhesive cures. This makes anti-slip or non-sag properties essential in vertical applications to prevent tiles from sliding after placement. Choosing the right adhesive helps ensure:
- Strong initial grab and grip
- Long-lasting adhesion
- Prevention of slippage or tile droop
- Compatibility with tile type and wall surface
- Waterproof surface
Modern high-performance adhesives are formulated to resist slip, moisture, and environmental stress — making installation easier and results more reliable.
Step-by-Step Guide to Perfect Wall Tiling
Follow these steps carefully to ensure your wall tiling project looks professional and lasts for years.
- Prepare the Wall Surface
Good preparation is half the job:
- Make sure the wall is clean, dry, and free of dust or grease.
- Remove loose plaster, paint flakes, or any surface contamination.
- Repair cracks or uneven spots so the surface is smooth and flat.
- If the wall is very porous or crumbly,
Tip: A properly prepped surface improves bonding and reduces the likelihood of tile failure.
- Plan Your Tile Layout
- Use a pencil and measuring tape to mark the centreline of your wall.
- Dry-fit a few tiles without adhesive to preview the layout.
- This helps you avoid tiny cut pieces at edges and ensures symmetry.
Planning ahead also lets you estimate adhesive quantity and tile count more accurately.
- Mix the Tile Adhesive
- Follow the manufacturer’s instructions for water-to-adhesive ratio.
- Use a mixing bucket and paddle drill to achieve a lump-free paste.
- Let the mix slake (rest) for a few minutes, then remix before use.
A proper mix consistency is crucial: too watery weakens the bond; too thick reduces workability.
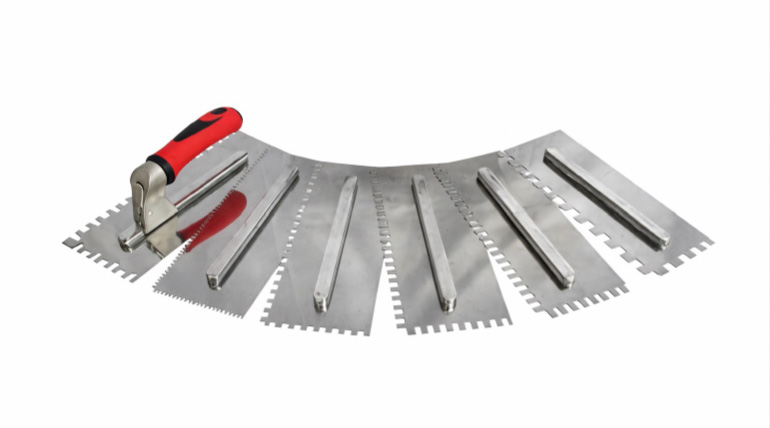
- Apply Adhesive with a Notched Trowel
- Spread adhesive on the wall surface using the flat side first to get base contact, then comb with the notched edge (usually at 35-45°).
- Work only on small sections you can tile before the adhesive starts to skin over.
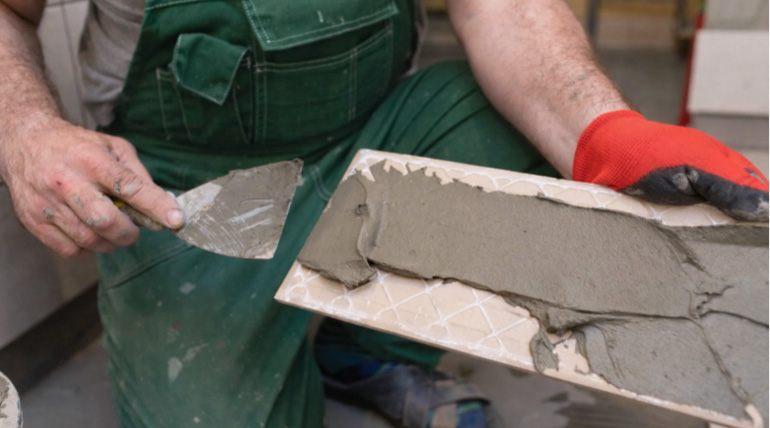
- For larger or heavier tiles, consider applying adhesive to both wall and tile back (“buttering”) to ensure full contact — known as the double-buttering technique.
This creates consistent ridges that improve tile grip and even coverage.
- Place Tiles on the Wall
- Begin from the bottom and work your way up row by row.
- Press each tile firmly with a slight twisting motion to eliminate air pockets.
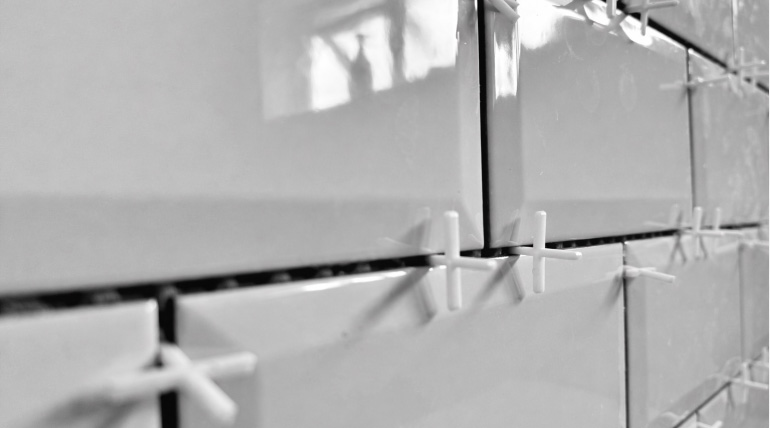
- Use tile spacers to maintain even grout joints.
- Check the level frequently to ensure tiles remain straight and plumb.
Putting tiles on before adhesive dries gives you time to adjust, but don’t delay too long — adhesives have a working open time.
- Let Adhesive Cure
- Follow the adhesive brand’s recommended drying time (usually 24-48 hours).
- Grouting and Cleaning
After the adhesive sets:
- Prepare grout mix and apply with a grout float diagonally across joints.
- Wipe excess grout with a damp sponge.
- Once grout dries, clean haze from the tile surface.
Correct grouting finishes the installation and seals joints to protect against moisture.
Tips for Perfect Vertical Tile Adhesion
✔ Work in manageable sections so the adhesive doesn’t dry before tiling.
✔ Always check level and alignment — small errors compound quickly.
✔ Use the right trowel notch size based on tile dimensions.
✔ Avoid over-spreading adhesive; apply only what you need.
✔ Clean adhesive spills before they cure to prevent stains.
Common Mistakes to Avoid
- Skipping surface preparation
- Mixing adhesive incorrectly
- Applying tiles after adhesive skinned over
- Not checking for tile alignment and level continuously
Avoiding these mistakes helps improve longevity and finish quality.
Although not required, back-buttering is recommended for large-format, heavy, or low-porosity ceramic tiles. It boosts adhesion, covers completely, and prevents hollow spots.
Final Word
Wall tiling — when done right — enhances both aesthetics and functionality. From surface preparation to final grout clean-up, each step impacts the success of your tiling project. The right tile adhesive for vertical walls with strong grip and anti-slip performance makes installation easier, faster, and more durable.
At Walplast, the HomeSure TileEx range from EX 11 to EX 55 offers adhesives with anti-slip formulation designed to perform on vertical surfaces. By checking your tile type, substrate conditions, and environmental exposure, you can choose the right TileEx product that ensures a secure and long-lasting tile installation — every time.