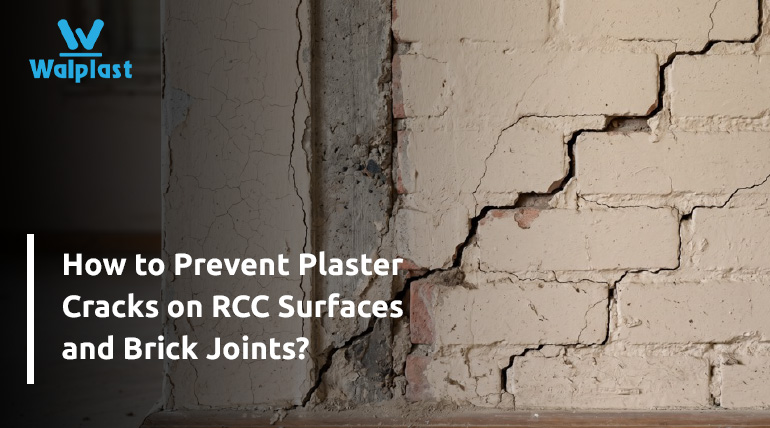
You are not the only one who has had to deal with a ceiling or walls that looked fine at first but started showing tiny cracks after a few months. One thing that contractors, site engineers, and homeowners all over India are most interested in is how to keep plaster from cracking on RCC. Good news: the problem can be solved as long as you do things the right way and use the right tools.
Why does plaster crack on RCC and brick surfaces?
Before trying to get better, it’s helpful to know what’s going on below the surface. Cracks in plaster don’t happen by chance; they follow patterns that can be explained by material science and bad surface preparation.
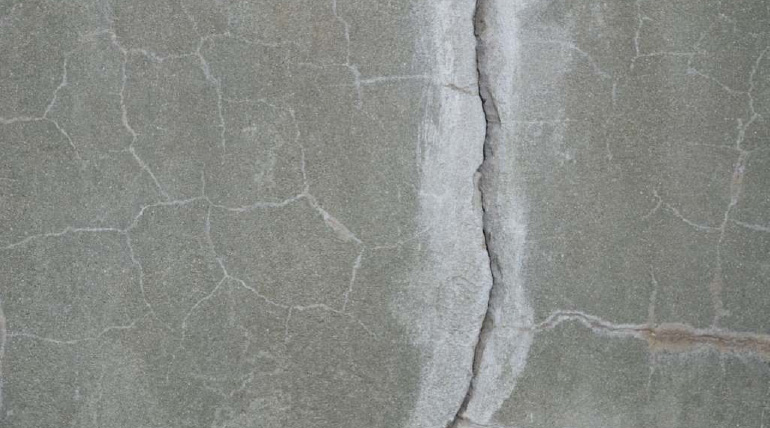
● Thermal expansion: When the temperature changes, RCC and gypsum plaster expand and contract at different rates. This makes stress lines appear on the surface over time.
● Poor surface bonding: Plaster doesn’t stick to smooth concrete very well, especially when it comes to ceilings that are being plastered. Delamination and cracking will happen if you don’t do the right prep work.
● Differential shrinkage: When two types of materials are joined together, they shrink in different ways as they harden. This phenomenon is a common reason why there are hairline cracks along the lines of the joints.
● Rapid drying: Plaster that is put down in direct sunlight or hot, dry conditions loses water too quickly, which stops crystals from forming properly and cracks the surface.
Gypsum plaster vs cement for RCC. Which is better?

This is a very common question on the site, and the answer is easy to see. There are a lot of ways that gypsum plaster is better than cement for RCC interior surfaces.
When cement plaster dries, it shrinks a lot. This is one of the main reasons why it cracks, especially on smooth RCC surfaces like ceilings and columns. Walplast gypsum solutions, on the other hand, only slightly expand as they dry. This means that it fills in tiny gaps instead of pulling away from them. It also has a naturally smooth finish, doesn’t need water to cure, and sets faster, which cuts project timelines by a large amount.
For interior plastering concrete ceilings and walls, gypsum plaster is the modern standard. For outside surfaces and wet areas, cement plaster is still useful, but it’s not even close to being comparable to RCC for inside uses.
Step-by-step: the right way to apply gypsum plaster on RCC
Keep an eye on this process; each step builds on the last. Here is what you need to do to Prevent plaster cracks on RCC:
Step 1: Clean, Prepare, and Dampen the Surface
Thoroughly clean the RCC or brick surface by removing dust, oil, curing compounds, loose particles, and any contaminants that may affect adhesion. For stubborn residue, use a wire brush or mechanical grinder to create a sound surface. Before plaster application, lightly dampen the substrate to prevent it from absorbing water too quickly from the plaster, which can lead to shrinkage cracks. Ensure the surface is moist but not waterlogged.
Step 2 Apply a bonding agent for plaster where hacking isn’t possible
If mechanical hacking could weaken the structure or the RCC surface is too smooth, apply a plaster bonding agent instead. A quality bonding agent creates a chemically active surface that helps gypsum plaster adhere securely and uniformly. Apply an even coat and allow it to dry before plastering.
For enhanced performance, HomeSure recommends replacing conventional RCC hacking with HomeSure GypEx Walbond, a specialised bonding agent designed to ensure superior adhesion for gypsum plaster applications. This approach minimises surface damage, reduces labour effort, and creates a consistent bonding layer for improved plaster durability and finish.
Step 3: Mix and apply gypsum plaster
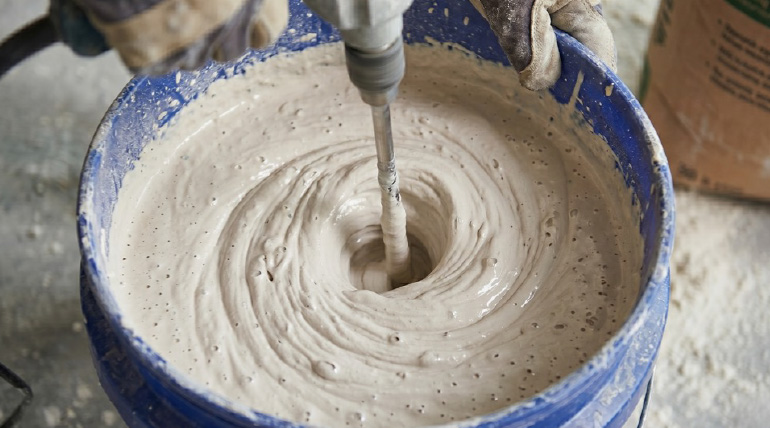
Plaster should be added to water, not the other way around. Mix until the mixture is smooth and free of lumps. Use even strokes to cover the area to the recommended thickness, which for a base coat is usually 10–12 mm. For a flat, even surface, use aluminum screeds as guides.
Step 4: Allow Proper Drying Before Painting Application
After plaster application, allow the surface to dry completely before applying paint or any decorative finish. Avoid exposure to direct sunlight, strong drafts, or sudden temperature changes during the initial drying phase, as gradual and uniform drying helps achieve a stronger, crack-resistant surface. For best results, ensure the plaster is adequately dry and allow a minimum of 72 hours before starting painting applications.
Pro tip for brick joints:
Put a strip of alkali-resistant fiberglass mesh tape over each joint line before you plaster. This fills in the gaps where bricks and mortar move differently, making joint-following cracks much less likely.
Myth vs. fact: clearing up common misconceptions
Here are some ways that myths and facts are different:
Myth: Gypsum plaster cannot bond to smooth concrete.
Fact: With proper surface preparation, quality bonding agent for plaster (HomeSure GypEx Walbond), gypsum bonds reliably and durably to smooth RCC surfaces.
Myth: Thicker plaster means fewer cracks.
Fact: Excessive thickness actually increases the risk of cracking due to higher internal drying stress. Always apply within the recommended thickness range.
Myth: Cement is always the safer choice for RCC surfaces.
Fact: When comparing gypsum plaster vs cement for RCC interiors, gypsum consistently outperforms on shrinkage, finish quality, and application speed. Cement plaster’s higher shrinkage rate makes it more crack-prone on interior RCC.
Myth: Surface cracks are purely cosmetic and harmless.
Fact: Even hairline cracks allow moisture ingress, leading to dampness, paint failure, and long-term structural concerns if left unaddressed.
Conclusion
To keep plaster from cracking on RCC, you should first use a product that is made for the job. Walplast GypEx Silver Plus Plaster is made to work with the wide ranges of temperature, seasonal changes in humidity, and different types of surfaces that are most often found on construction sites in India.
Our wall plasters like GypEx Silver Plus Plaster and GypEx Silver Plus Plaster have controlled setting times, are easy to work with, and are always of consistent quality from batch to batch. If you use proper bonding primer the right way, cracking on RCC surfaces and brick joints will no longer happen and will not cost you money to fix over and over again.