Dreaming of a tiled revamp for your kitchen, bathroom, or another room? Tiles are a fantastic way to elevate your home’s aesthetics. But before diving in, understanding proper installation is crucial. Incorrect tile installation can lead to unsightly gaps, uneven surfaces and even safety hazards from loose tiles.
While traditional cement is an option, tile adhesives have become the go-to choice due to their ease of use, superior strength and adaptability. This guide focuses on achieving a flawless tile installation using tile adhesive.
Ready to get started? Let’s begin with the fundamentals!
What is Tile Adhesive?
Tile adhesive is a factory-made, specially formulated dry powder that is mixed with water or polymers to form a consistent paste for problem-free tile installation. There are innumerable types of tile adhesives available, varying in composition and quality due to their ingredients and manufacturing process.
The Mighty Role of Tile Adhesive
Imagine tile adhesive as the invisible handshake between your tiles and the underlying surface (walls, floors, etc.). This strong bond prevents:
– Fractures: Over time, without proper adhesion, tiles can crack or break. Tile adhesive creates a solid connection that keeps them stable.
– Looseness: Loose tiles are not only unsightly, but they can also become tripping hazards. Tile adhesive ensures they stay firmly fixed.
– Uneven Surfaces: Tile adhesive helps distribute the weight of the tiles evenly, leading to a smooth and level surface. This is crucial for both aesthetics and functionality.
Here’s where tile adhesive goes above and beyond:
– Waterproofing: Many tile adhesives offer water resistance, making them ideal for damp areas like bathrooms and kitchens.
– Durability: High-quality tile adhesives are formulated to last, providing a long-lasting bond that withstands wear and tear over time.
By choosing the right tile adhesive for your project and following proper installation procedures, you unlock the full potential of this amazing product, guaranteeing a beautiful and functional tiled surface that lasts.
Mixing and Applying Tile Adhesive: A Step-by-Step Guide
Already got pre-mixed adhesive? Lucky you! Just grab your trowel and get going (we’ll cover the application in a bit). Need to mix your own adhesive? No problem!
Here’s how:
Preparation is Key!
1. Surface Prep: Before mixing adhesive, make sure your work area is clean and debris-free. Dampen the surface with clean water and let any excess water drain off.
2. Manufacturer’s Guide is Your Bible: Each adhesive might have slight variations in mixing ratios, suitable tile types and required tools. Refer to the manufacturer’s instructions for specific details.
Mixing Magic:
1. Water First: Always add water to the bucket first, following the recommended amount in the manufacturer’s guide. This helps prevent clumps.
2. Safety First: Protect yourself! Wear gloves, safety glasses and a face mask when handling adhesive powder.
3. Add & Stir: Slowly add the adhesive powder to the water while continuously mixing with a mixing paddle or a drill with a mixing attachment. Ensure you reach all sides and the bottom of the bucket to avoid unmixed pockets.
4. Smooth Operator: Keep mixing until you achieve a smooth, lump-free consistency, similar to peanut butter. This ensures proper adhesion and easy application.
Now that your adhesive is ready, let’s move on to applying it to your tiles!
Applying Tile Adhesive: Precision and Patience for Perfect Results
To ensure the adhesive sets correctly and minimize waste, work with manageable sections at a time. This allows for better accuracy and prevents the adhesive from drying out before you can use it.
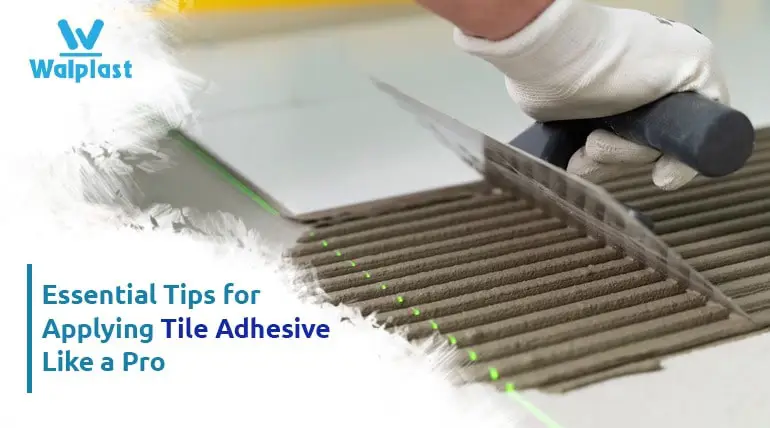
The Art of the Trowel:
Your trusty trowel comes into play now! Use it to create ridges in the adhesive. These ridges help create a strong bond between the tile and the surface by providing more surface area for the adhesive to grip. Aim for a consistent “harmonic channel” pattern with the ridges.
Setting the Tile:
1. Be Gentle: Carefully place the tile onto the adhesive bed.
2. Twist & Secure: Give the tile a slight twisting motion as you press it down. This ensures good contact, removes air pockets and securely positions the tile.
3. Repeat & Conquer: Methodically work your way through all the tiles, following the same process.
Waiting is Wise:
After applying the adhesive, resist the urge to rush ahead! Allow the adhesive sufficient time to “cure” or set properly. This dwell time is crucial for a strong and lasting bond. Refer to the manufacturer’s instructions on the packaging or product guide for specific drying time recommendations.
By following these steps and practicing a little patience, you’ll be well on your way to achieving professional-looking tile installation with minimal stress!
How Much Tile Adhesive Do You Need?
The amount of tile adhesive you’ll need depends on a few factors:
1. Surface Area: The main factor is the total surface area of the space you’re tiling, measured in square meters. This will give you a baseline estimate of how much adhesive you will need to cover the entire area.
2. Coverage per Kg: Different tile adhesives have varying coverage areas per kilogram. This information is usually provided by the manufacturer on the product packaging or data sheet. Refer to this to understand how much adhesive one kilogram can cover.
It’s wise to add a 10% buffer to your calculated quantity to account for potential spills, wastage during application, or the need for minor adjustments.
Final Tips:
– Always refer to the manufacturer’s recommendations for specific coverage details and application instructions.
– Consider contacting the manufacturer or checking their website for free estimation tools or calculators.
By following these steps, you should be able to determine the appropriate amount of tile adhesive for your tiling project.
For expert advice and to ensure quality, check out Walplast’s HomeSure Tilex Tile Adhesive range. They are veterans in the field and have tile adhesives for every need. Please refer to their website – [www.walplast.com] to get detailed information.
The Perfect Finish: Wrapping Up Your Tile Project
So there you have it! With the knowledge of tile adhesive, its application process and how to estimate the right amount, you’re well-equipped to embark on your tiling journey. Proper tile installation is key to achieving a beautiful, durable and functional tiled surface. By following the steps outlined in this guide and using high-quality tile adhesive from Walplast, you can transform your space with confidence!
Happy tiling!